
E8 | Essex County Colonial | Starting To Finish
Season 48 Episode 8 | 23m 42sVideo has Closed Captions
Kevin visits homeowner Ethan at his workshop where he teaches woodworking to students.
Kevin O'Connor meets homeowner Harley and designer Sarah-Elizabeth as they select the perfect Southwest red for the dining room. He then visits homeowner Ethan's woodworking co-op, where Ethan teaches carpentry skills to local students. Zack Dettmore builds a period-correct mantel with architect Dan Kopec and sees tiler Gary Moreland's painstaking primary-bath tile.
Problems playing video? | Closed Captioning Feedback
Problems playing video? | Closed Captioning Feedback
Funding for THIS OLD HOUSE is provided by The Home Depot and Renewal By Andersen.
Support provided by:


E8 | Essex County Colonial | Starting To Finish
Season 48 Episode 8 | 23m 42sVideo has Closed Captions
Kevin O'Connor meets homeowner Harley and designer Sarah-Elizabeth as they select the perfect Southwest red for the dining room. He then visits homeowner Ethan's woodworking co-op, where Ethan teaches carpentry skills to local students. Zack Dettmore builds a period-correct mantel with architect Dan Kopec and sees tiler Gary Moreland's painstaking primary-bath tile.
Problems playing video? | Closed Captioning Feedback
Where to Watch This Old House
This Old House is available to stream on pbs.org and the PBS app.
Keep Exploring

This Old House Insider Newsletter
Get This Old House exclusive stories, tips, and behind-the-scenes information delivered right to your inbox every month.Providing Support for PBS.org
Learn Moreabout PBS online sponsorshipKevin: Today on "This Old House"... Our homeowner, Ethan, is a professional woodworker.
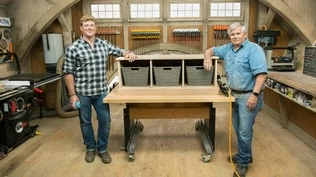
This is his shop, but he's also using it to work with kids, to teach them woodworking skills and to have an impact on the community.
And we'll show you how to take vintage subway tile to a whole new level.
♪ ♪ Man: Ahh.
That's it.
♪ ♪ ♪ Kevin: Hey there, and welcome back to "This Old House" and to our project here in Essex County, New Jersey, where we're working on our Dutch Colonial revival built in the 1890s.
I'll start with the outside.
Not a lot going on out here because most of the work is all on the inside, but the shingles that are up on the house are being saved.
This is all going to get a new coat of paint.
You can see some infill work here and some more infill around this window, for example.
Love to see the woven corners right here.
It tells you that a craftsman installed these pre-dipped cedar shingles.
And then we can also see some exterior trim.
So we've got beadboard on the ceiling of this back door overhang.
And then, that and the fascias, the soffit, the sills, the casings, all of that is PVC.
Pretty much everything out here in terms of trim is except for this bracket right here holding up our overhang.
That is cedar, although they're going to paint this white to match everything else.
So, still looking a little rough back here.
We don't have our back deck yet.
We don't have our bluestone patio.
But in terms of finishes and progress, most of that is going on inside.
So, as you come in from the back, you enter into a new mudroom.
And cool feature here -- there's going to be a bench, which makes sense.
And its top, Ethan actually milled this from the old original kitchen floor joists that were taken out when they reframed the kitchen.
So he's turning that into a bench down here as well as up in the laundry room.
Casings around the doors.
And here they used a flat profile to match the profile that is on the windows.
Ethan and Harley said use as much original materials as you can everywhere.
So, when you've got that, which is actually not original to the house, we don't think, certainly not throughout, they decided adjacently they would use flat stock.
But as you push into the main house, you can see that the casings now have a profile.
This was milled custom for us, so it's an exact match to what's on the first floor and second floor.
And then, when it comes to the doors, they said, "Yeah, reuse these, too."
So the basement door stays.
And this is a one, two, three, four, five panel.
And that is a flat profile.
So that was reused.
But then, where they couldn't reuse doors, they bought off-the-shelf doors that are also one, two, three, four, five.
But you'll notice this is a raised panel.
So those are the compromises you make in these old restorations.
Where do you use this?
Where do you match?
How far do you go?
And in terms of going far, the kitchen is the place where most of the progress has been made.
Hey, Zack.
Good to see you.
Zack: Nice to see you, Kevin.
Kevin: Love what I'm seeing, especially in here.
Wow, look at this.
The old cabinets are up all around -- beautiful.
Zack: And we got countertops already.
Got some quartzite in there.
Kevin: Can I have a peek?
Zack: Yeah.
Go ahead.
Kevin: Oh, yeah.
Look at that.
So durable, but also, that color is a great match to the wood tones right there.
Although you guys went with a bold color for the island cabinets.
Blue, right?
Zack: Yeah.
There's a lot of paint decisions to be made in this house, so Sarah Elizabeth, the designer, picked all the colors with the homeowners.
They got that schedule of paint to Camille, and Camille printed out all of these room-by-room signs so we don't make any mistakes.
Kevin: All right, let me see that.
Wait, are you telling me that they're asking for mayonnaise on the wall?
They got kids, right?
They don't need a painter to get mayonnaise on the wall.
Zack: Yeah, so, believe it or not, we've had a lot of jobs where we painted dove white instead of white dove.
So we find having it very crystal clear on the wall helps everyone, the homeowners, the designers to know what's going on.
And Harley and Sarah Elizabeth are actually talking in the other room if you want to catch up with them.
Kevin: That's all I need to hear.
Thank you, Zack.
Sarah: Earthy... Kevin: Hey, guys.
Harley: Hi, Kevin.
Sarah: Hi, Kevin.
Kevin: You must be Sarah Elizabeth.
Nice to meet you.
And I heard the good news.
Harley: Yes, baby number two.
Kevin: Congratulations.
Boy, girl?
Harley: Thank you so much.
It's a boy, yeah.
Kevin: And happy and healthy?
Harley: Everyone's doing great.
Kevin: Nice.
I love to hear it.
All right, well, back to work.
So we're picking colors.
Dining room is an important room to you and Ethan, right?
Big, bold room.
You love this room.
Harley: Mm-hmm.
Kevin: What'd you start with?
Harley: So we were really inspired by photos of American Southwest decor and just being there.
And Sarah Elizabeth can speak to where we took it from there.
Sarah: Sure.
Absolutely.
So we were really looking at those, like, canyon, earthy colors, like Harley had said, but we wanted to punch it up a little bit, give it a little more saturation so there's a little drama.
And what's so much fun is that, when somebody enters the front door, they're going to see a pop of this deep red, and they're going to really be drawn in into your home, into the room, and say, like, "What's that?"
Kevin: All right.
Yeah.
So let's talk about what's that?
What do we think of these?
Harley: So these are all in the general neighborhood of what we're looking for.
But there's something not quite right about each of them.
So this one's a little too fuchsia.
This one's close, but it's a little too orange.
And this one's not even red, really.
This one, though, is almost -- It's pretty perfect, honestly, because it's the perfect mixture of brown and red, and it's a really rich color.
Sarah Elizabeth, you hear this a lot?
It's almost a little too much or too little of this.
It's always a fine with color.
Sarah: Yes, absolutely.
We don't usually get it on the first try.
There are thousands of colors out there, so I'm not worried.
Kevin: Okay.
Sarah: We just keep editing.
Kevin: So, if this is the contender or the final choice, you've got dark stained trim.
Do you keep it so that you've got dark on dark, which you guys call color drenching, is it?
Sarah: Yeah, it's called color drenching.
But in this case, we're going to do white trim to match the rest of the home.
Kevin: That works.
Well, we love decisions, especially when two are made at the same time.
So that is good news.
But for now, again, congrats, and I'm going to keep moving.
Harley: Thanks so much, Kevin.
Sarah: Thanks, Kevin.
Zack: Hey, Kevin.
Kevin: What are you working on?
Zack: I'm using the new Ask+ AI feature on the "This Old House" website.
Kevin: AI, huh?
Zack: Yeah, it's pretty cool.
Like, we're at the stage of the job the walls are closed, painters are coming soon, so I could just search "best way to prep for paint."
Kevin: Yeah.
Zack: And check that out.
Kevin: Look at that.
Materials list, step-by-step instructions, even helpful tips.
Not bad.
Zack: Yeah.
Everything we need to know right there.
Kevin: All right.
Good for a pro, good for homeowners, too.
Zack: Yeah.
It's a really good resource.
Kevin: Nice.
Hey, don't forget the drop cloths.
Zack: Can't forget the simple stuff.
♪ Kevin: On "This Old House," we meet homeowners from all walks of life.
And on this project, our homeowner, Ethan, is a professional woodworker.
This is his shop.
But he's also using it to work with kids, to teach them woodworking skills and to have an impact on the community.
Ethan: So the woodworking co-op I founded in 2023 essentially as just equitable access to trade skills.
You know, we're teaching trade skills, sure, but we look at them also as life skills because these things aren't necessarily taught in schools.
Some people might not have a supportive home environment to get this.
So we believe that that feeling and that skill set belongs to everybody.
Yeah.
Good.
So we're co-facilitating and participating in a six-week summer youth employment program.
So it's urban farming and agriculture.
And what that looks like for us is building planter beds, building benches to beautify the garden and learn trade skills through that.
And they're also getting paid to be here.
So there's a pride in building something, but there's also a sense of accomplishment in taking home some money for what they did and what they made with their own two hands.
Kevin: Hey there.
I'm Kevin.
Dennis: Hi.
Nice to meet you.
Dennis.
Kevin: Dennis?
Nice to meet you.
What are you working on?
Dennis: Okay.
So I'm working on this cutting board right now for my house.
Our current cutting board is pretty trash, so I just said, why not make a good one out of some wood?
Kevin: So what's your story?
Like, school, local?
Give me the... Dennis: Well, I'm going to go into college this year.
But, like, right now it's just my summer.
And I just said, like, why not try to spend my summer learning some hands-on skills because I want to be a doctor.
Kevin: You're headed to college and you want to be a doctor, so you going pre-med?
Dennis: Yeah, I'm going pre-med.
Kevin: And you're now working in a wood shop on a cutting board.
Make that connection for me.
It's very similar to, like, something like science.
Like, I even learned that wood is still alive when you're, like, doing these things.
And it can, like, bend and it can change its shape.
So, um, it's definitely very interesting, but cool at the same time.
Kevin: All right.
Well, just, you know, make sure you use food safe oil.
Dennis: Got it.
Kevin: Keep at it.
Nice meeting you, man.
Dennis: Thank you.
Ethan: So when I started woodworking, I knew that I wanted to do it as a career, an occupation.
But I didn't have the knowledge.
Nobody was hiring me because I didn't have the knowledge.
I couldn't get the knowledge because nobody was hiring me.
I didn't go to trade school.
And I want to remove that and give the opportunity to people so they don't find themselves in that circumstance.
I don't think individual life circumstances should hold somebody from getting trade knowledge, and that's what we're out to do.
Kevin: Hey, there, I'm Kevin.
Tamari: Nice to meet you.
I'm Tamari.
Kevin: Tamari?
Nice to meet you.
What do you got going?
Birdhouse?
Tamari: Yeah, a birdhouse for outdoors.
It has, uh, one main house for bigger birds.
And this will be the smaller house for the smaller ones.
Kevin: Is this something you drew, or are you going off of a different plan?
Tamari: This is something I drew.
Then I made it in scale.
Kevin: There you go.
Kevin: And prior to this program, had you ever turned your drawings into physical things, or this program is the first time?
Tamari: This is my first time.
Kevin: How's that feel?
Tamari: It feels really, like, good to experience new things like this.
I would have never thought I would have been doing this, like, five years prior.
Kevin: Well, looks good.
Keep at it.
Nice to meet you.
Tamari: Nice to meet you.
Ethan: So, for the house, I've built three things so far.
Two vanities and a bench for the mudroom.
And they see it.
They see how things are put together.
Learning about glue up techniques, joining, planing.
They're learning everything and helping me when they can.
Kevin: Hey, guys.
Elijah: Hello.
Kevin: I'm Kevin.
Elijah: Elijah.
Kevin: Elijah, nice to meet you.
So I got to get your story here.
Like, how did you end up here?
Why are you here?
Elijah: You know, it was my freshman year.
I do, um, construction as a CT.
Kevin: CT is what?
Elijah: Just like a career for my school.
Kevin: So you're learning all of the trades that go into building a house.
Elijah: Yes.
Kevin: Some classroom work.
Is there some hands-on work with that stuff, too?
Elijah: Yes.
Kevin: Yeah.
But this is now the finer woodworking.
Elijah: Yeah.
Kevin: Don't listen to this part.
How's he doing, Ethan?
Ethan: Elijah's amazing.
Kevin: Yeah?
He has expressed interest in becoming a master plumber in time, so we've done a few PVC repairs around the shop.
Kevin: Nice.
If you're going to go to the plumbing route, you're going to be busy forever.
In fact, you're going to be busy forever any route you go in this field.
All right.
What's today's project?
Ethan: So, today we're doing the rail and stile doors.
Kevin: Okay.
For this thing behind us.
Ethan: Correct.
So this is a double vanity for the primary at the house.
Kevin: Beautiful.
Ethan: So we chose white oak with it.
We'll give it a nice subtle brown.
Not trying to take away any of the character.
And it's actually quartersawn white oak.
Kevin: Very nice.
Ethan: So, very excited to see the polish.
Kevin: This is your handiwork, your design, your work as a furniture maker.
Ethan: Yes, sir.
Kevin: Okay.
Ethan: And today we're doing rail and stile doors.
So four doors, three drawers.
These will go in and we're doing just traditional cope and stick joinery.
Crispy.
Good job Elijah.
Kevin: Elijah, what do you think?
Elijah: Good.
Kevin: Do you know when you're in the presence of a good, patient teacher?
Elijah: Of course.
Kevin: Yeah.
You do.
Awesome.
So, from here?
Ethan: I'm going to take this to the router table.
So I'm going to do the cope and stick.
I think Elijah here is going to mill up some more white oak.
We have Dennis on the cutting board, Tamari in the birdhouse.
Hasheem's got some more instructing to do, so there's a lot to get done.
Kevin: Good deal.
Elijah, nice meeting you.
Elijah: Of course.
Kevin: And, Ethan, I love the shop.
And I love what you're doing here, so thanks for that.
Oh, and by the way, congratulations on the new child.
Ethan: I appreciate that.
Kevin: Yours and Harley's other project.
Ethan: Yes, that's a meaningful one.
Kevin: Yeah, I bet.
We'll see you back at the house.
Ethan: Great.
Thank you, Kevin.
Kevin: All right.
Thanks, guys.
Ethan: Appreciate it.
♪ ♪ Zack: One of the great things about this project is our architect, Dan Kopec, is not only a great draftsman, but also a skilled builder, as well.
So he can handle the conceptual design and the layout, but also the nitty gritty details like the mantel and the dining room.
Dan: Oh, we're getting to trim carpentry.
This is the good stuff.
Zack: We are, yeah.
Finally working on this mantel you designed.
Dan: Nice.
Zack: Originally, they just sort of had some brackets with a plank of wood over it.
Dan: Right.
Zack: I don't think that looked great.
Dan: Right.
I don't think those metal brackets that were here were original, and, so, what we're going to try to do now is put a new mantel shelf on here that feels period appropriate.
Zack: Right.
So, following your design, I installed an eight-inch mantel shelf and built out the base below it.
I also see that there's a decorative molding on the base below the shelf.
What can you tell me about those elements?
Dan: There's a couple rules to some of these moldings.
Zack: Yeah.
Dan: The first thing we did for the mantel shelf, the primary piece of molding is exactly the profile that you guys have installed as the crown in here.
And that makes sense, right?
This is going to complement that when it all comes together.
We know that this is a terminating molding, right, to be in what is effectively a cornice here or a crown because the end profile goes out.
And if we look at it here, the whole profile is coming out with the shelf, right?
That's our top molding.
The other piece that we have is this bed mold that's going to live underneath the shelf.
Zack: Mm-hmm.
Dan: And a bed mold is a supporting molding.
And, so, that bed mold profile terminates upward.
Zack: I bet most carpenters don't have that information.
Dan: No, but it's a simple rule.
And once you have it, now you've got it, right?
The other one here, from an aesthetic decision, is, if we strike a line from where we're touching the brickwork out, we've got about a 45-degree line that's running along the bed mold that's running along the box that you built out, that's running along this molding to the shelf, and everything lines up along that line.
Zack: Got it.
Should we put some of your skills to the test and build the rest of this with me?
Dan: Let's do it.
Zack: All right, let's do it.
My policy is always do the least obvious first so we can practice on the thing that people won't notice as much, right?
Dan: Sounds good.
Zack: All right.
You want to hold that side sort of where you want that miter, and I'll mark over here.
Dan: You got it.
All right.
Zack: All right.
All right.
If you want to mark that little guy, I can make that cut at the same time.
Dan: Yep.
Let's take a look at this guy.
Zack: I'm gonna put it upside down in the saw and hold it up against the fence.
Let's just hold up the center one.
Kind of mock up everything and see if our miters are correct.
That's pretty good right there.
Dan: Yeah.
I'm home.
Zack: I'll just pop a nail in the middle of it.
All right.
You want to assemble that miter?
I can cut the next piece.
Dan: Sounds good.
Zack: You did a lot of hands-on carpentry in your life, correct?
Dan: I have.
I've built furniture.
I built my own house.
And I like to know how to build the things that I draw.
Right?
And so that, when I give it to you, I know that it can be executed.
Zack: I gotta say, every time I build something you design, I'm always pleasantly surprised how well thought out it is.
Dan: Yep, we're home.
Nice.
Zack: A little bit of glue.
Dan: This room is going to be primarily lit from a chandelier that's hanging up here.
It's going to light these shadow lines and those shadow lines, and the whole thing is going to come together.
Zack: Perfect.
Well, I appreciate the help, thanks.
Dan: Hey, it was great to see you.
Zack: See you later.
Dan: Take care.
♪ ♪ Kevin: Hey, Gary, Zack, Good to see you.
Gary: Hey, Kevin.
Kevin: How you been?
Gary: Good.
How are you?
Kevin: All right.
So, bathroom.
Good progress.
Wow.
This is starting to come together, and I had an opportunity earlier to see the vanity that's being custom made by Ethan.
Zack: Oh, nice.
Kevin: So now I know where it's going.
This whole primary bathroom tile job has been like your guys' white whale.
Like, are you satisfied?
Have you bumped into things that you didn't expect?
Like, how's it been going?
Zack: I'm obsessed with it.
Yeah, I love it.
I mean, if you really want to see what I think exemplifies some of Gary's work, is this niche over here.
Check out this masterpiece.
This was a headache and a half.
Kevin: Okay, well, niches are common these days, and there's a lot of -- I mean, there's even some prefab boxes that can go in.
What was so complicated about this?
I mean, it looks gorgeous, don't get me wrong.
What was the headache?
Zack: The headache was really I had to handle the framing before the tile, and I had to figure out where it was landing.
And when Ethan and I spoke, we talked about getting it to be four tiles tall.
And then, I realized, once it was all framed and done and dusted, that it actually had to be five tiles tall to make the layout work.
As you see, all of these things fold into each other, and if you make it four, you throw off the pattern.
And there's just a lot of that, a lot of that not understanding just how complicated it is.
So it just took some rework.
Kevin: Yeah.
I mean, the thing that I'm drawn to is that you've got sort of the sweeps, these beautiful curves, but also in the corners.
I presume these are some of the specialty tiles that you guys buy to pull that off with this whole design.
Zack: Exactly.
If you count it up, you've got one, two, three, four, five, six, seven tiles in the niche.
Kevin: In the niche.
And just to put it in perspective, if it had been done conventionally -- or I guess conventionally these days -- it would have been that sort of prefab box.
And then, it just would have been the same tile cut at a 90 degrees and butted together, and maybe even a metal corner.
Not the case with this.
Zack: Yeah.
So it was cool.
We got it done eventually.
Kevin: I love it.
That's one of the features that makes me feel like I'm literally down in the New York subway.
Zack: Right?
Kevin: Old school.
Okay.
You gave yourselves a lot of a headache there, Gary, is it safe to assume that you didn't give yourself a big headache on the floor?
When I see mosaic, I think these days that we're probably dealing with maybe a 12 x 12 sheet with a mesh back, you can lay one and just, you know, zip along.
Gary: I wish.
These were four different-sized film-faced tiles to make a pattern.
Kevin: Whoa, whoa, hang on a second.
So film-faced meaning... Gary: Plastic on top of the tile instead of a mesh on the bottom.
Kevin: That's interesting.
And four different sizes because... Gary: Otherwise it would look too repeated.
Kevin: Oh.
Gary: And they give you four different sizes, so it tricks the eye to think it is just... Kevin: I don't see that sort of suspicious seam at every 12 inches or whatever.
Gary: Exactly.
Kevin: So, if I don't have a mesh back in like 100 years when my Irish kin come to demo this bathroom, is it going to feel like each one of these mosaics was put down by hand?
Gary: Absolutely.
They're going to think it was done one by one.
Kevin: Oh, it's gonna be awesome.
Zack: They'll say, "Can you believe this is 300 years old?
This is the original tile."
Kevin: Okay, well, that is gorgeous.
Unfortunately, this whole section is going to be covered by Ethan's vanity, but that's all right.
It's going to be the same throughout.
And what's left?
Gary: Towel bars.
Kevin: Oh, you told us about this.
So instead of a hardware applied to the tiled wall, you've got a holder tile.
Two of them, actually.
Zack: Exactly.
Kevin: And it's just integrated now.
Zack: Right.
And the reason we're doing it now is because clients don't always know exactly where things go until it's sort of laid out.
And we didn't want to just sort of make a call.
They just had a baby.
They couldn't be here when we were tiling the walls.
So we just sort of full sent on it.
And then, the designer came through and said, this is what makes sense.
Because, you know, it could be here, it could be there, it could be up here.
And then, Gary actually came this morning and popped a tile out so he could get it in the right spot.
Kevin: So I see that one is in.
Are you ready to set this one?
Gary: I am.
I'm going to put a little silicone in here to stop the bar from always spinning.
Zack: All right.
You want the mortar?
Gary: I'm ready.
Kevin: And this is what I'm realizing for the first time, that when that's in, it's in.
There's not like there's a set screw underneath one of these to get it out.
Zack: Nope.
Once it's in, it's in.
Gary: All right, we're ready.
Zack: All right.
Kevin: I noticed you guys are using a piece of tape.
That's going to give you a little temporary clamp?
Gary: Temporary clamp.
Kevin: Beautiful.
Zack: Oh, that looks good.
Kevin: Oh, yeah.
So old school.
It is satisfying.
Beautiful.
All right.
And so you've got two more fixtures that go in right there?
Zack: Two more.
Kevin: Well, the progress looks terrific.
Speaking of progress, Zack, what do you think we've got coming up next time?
Zack: Well, we got a lot of painting and paint prep to do, and we're going to be moving on to all the finishes.
Kevin: Beautiful.
And, Gary, you think you'll be out of this bathroom by then?
Gary: I hope so.
Kevin: He says with a sigh of relief.
All right.
Well, until then, I'm Kevin O'Connor.
Gary: I'm Gary Moreland.
Zack: And I'm Zack Dettmore.
Kevin: For "This Old House" here in Essex County, New Jersey.
Kevin: Next time on "This Old House"... Zack: There are a ton of options out there when it comes to putting finishes on your floors.
I'm going to meet with Ethan, our homeowner, to discuss what is the right finish for his reclaimed Southern yellow pine floors.
Jenn: And we're going to take care of a big problem creeping into the backyard -- invasive bamboo.
Kevin: Then we'll show you the final details for the coffee bar, from the poles to the knobs to the antique mirrored backsplash.

 New Season
- Home and How To

Hit the road in a classic car for a tour through Great Britain with two antiques experts.
 New Episode
 New Episode

 New Episode




 New Episode



Support for PBS provided by:
Funding for THIS OLD HOUSE is provided by The Home Depot and Renewal By Andersen.